1. What is a photocell sensor?
Automatic lighting, such as street lights, usually use photocell sensors—also known as light eyes—to sense the amount of ambient light. Once the photocell detects a low enough light level, it will turn on the light, or conversely, an increase in external light level will turn off the light.
The photocell consists of resistors attached to the photosensitive plate. When more light shines on the light panel, the resistance (current through the resistor) will change and the light will turn on or off. This technology is suitable for all types of outdoor places.
Since no user input is required, there is no need to worry about setting a timer or forgetting to turn on the lights. The working principle of a photocell is similar to that of an optical switch-therefore, a photocell sensor is sometimes called a photoelectric switch.
Photocells work throughout the year, activated at dusk and turned off at dawn, even if the day is longer in summer and shorter in winter. Since they can perceive the amount of light instead of working in a fixed time, they do not need to be adjusted when the sunrise or sunset changes with the seasons.
Many outdoor lighting devices use motion sensors. However, photocell sensors and motion sensors usually have different uses. For example, motion sensors may help keep stray animals away from trash cans and trash cans, while photocells can keep parking lots safe and light continuously for a long time.
2. How to install a photocell sensor for outdoor use
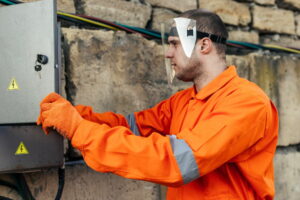
The following steps will guide you to install the photocell sensor. This project requires some electrical work, so if you feel unsure or safe to perform these tasks, you should contact an electrician to install the photocell for you.
- Turn off the circuit breaker of the outdoor light. If you don’t know which switch is supplying power to your lights, turn off all the switches in the building to ensure that the power has been cut off. Turn on the outdoor light switch, check again whether the power is off, and make sure it is not turned on.
- Remove the housing containing the external light source. You may want to use photos to record how it was broken down so you can easily reassemble it.
- Ablackwire and a white wire should be visible on the photocell. Those black wires need to be connected to the black wires that connect the lamps to the main power supply of the building. Disconnect the black wire from the house to the light fixture.
- Connect a black wire from the photocell to the black wire from the building. Be sure to tighten the bare copper wire to make the connection tight.
- Connect the second black wire on the photocell to the black wire on the lamp, making sure that the copper wires are completely twisted together.
- Cover your new connection with an electric cap. Make sure that the cover is tightly wound on the wire.
- Use electrical tape to fully glue your connection. Copperwiresshould not be exposed.
- To test the photocell, turn on the power again at the circuit breaker. Make sure that the light switch is on. Cover the photocell with your hand-when the photocell is closed, the light turns on, indicating that the photocell is working properly.
- Put your lamps back together to complete the installation of the photocell.
3. If you are installing a new light fixture, the process is similar to the above. To install a new light fixture, you may need the following equipment:
- New photoelectric switch
- Wire stripper
- Needle-nose pliers
- A screwdriver
- Voltage tester
- Electrical tape
- Line Nuts
- Silicone sealant
Steps to install a new fixture:
- Cut off the power at the circuit breaker.
- Disassemble existing lamps.
- Use the pre-installed photoelectric switch to install the new luminaire, using the attached installation instructions.
- To install the new light fixture, use pliers to cut off the 3/8″ insulation from the wire. Screw the black wire on the light fixture to the black wire of your home. Cover the new connection with a wire nut to make sure it is tight. Yes. The white wire does the same thing. Always connect the black wire to the black wire and the white wire to the white wire.
- Cover all connections with electrical tape and keep all wires away.
- Complete the installation of the luminaire according to the manufacturer’s instructions.
- Once everything is assembled, test your light as shown above.